


 Menyumbang untuk Pusat Anak-anak Yatim As-Solihin

Large Homemade Incubators 3
GOOSE INCUBATOR

Right Made From Old School Two Door Refrigerator
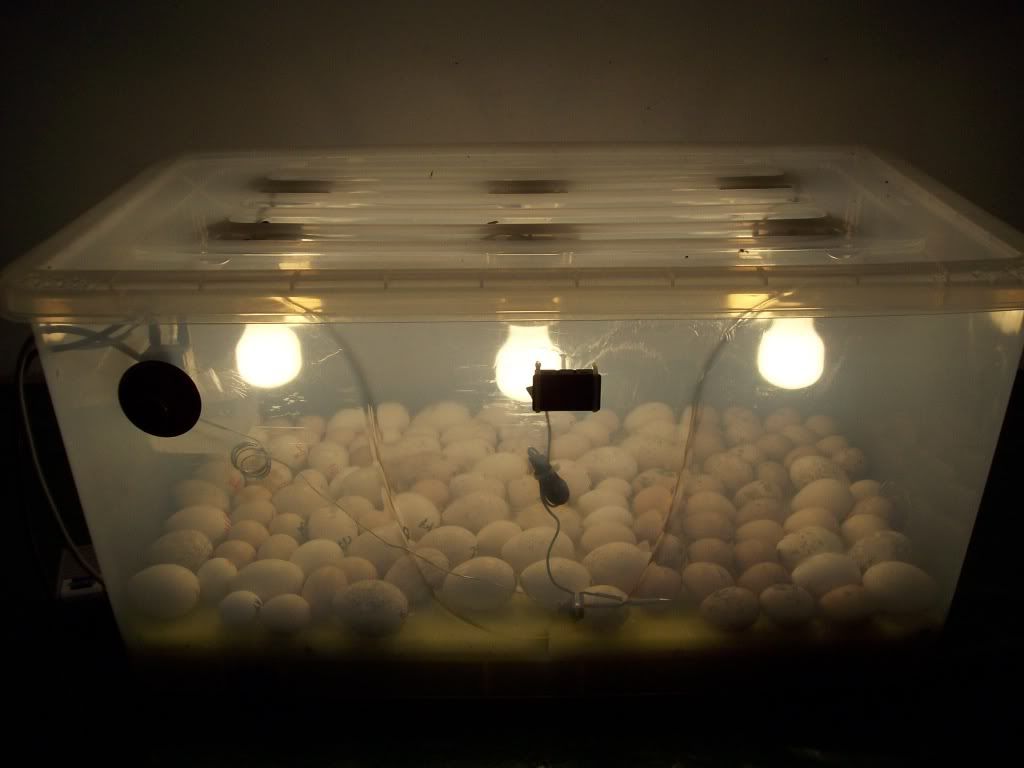
This is a school-type refrigerator. The two doors are open and not shown in the G1 but can be seen in G2. The unit on the left is smaller than the unit on the right as the right side is slightly taller. Goose eggs can be kept at 99.7 on the left while rhea and emu eggs can be kept on the right at about a degree lower or the right can be used as a hatcher for goose eggs. The middle between the two units is an enclosed chase with four openings at the top and four openings at the bottom that extend from the left side through to the right side. Two 100 watt bulbs are mounted at the bottom in the two center openings in the chase and two 40 watt bulbs are mounted in the two center openings in the top of the chase. The 40 watt bulbs are turned off and on as needed to regulate the temperatures at the top and bottom of the incubator, while the major heat dependence is on the 100 watt bulbs.

Goose Incubator Showing Glow Side With Bulbs Off At The Top
Fans And Sheet metal blocks At The Bottom Plus Hatching Baskets
Fans And Sheet metal blocks At The Bottom Plus Hatching Baskets

Goose Incubator Showing Thermometers
Observation Lights For Thermostats
Observation Lights For Thermostats
The thermostat system is a GQF electronic (#3258) thermostat backed up by a wafer thermostat. Both placed directly in front of one of the upper fans as can be seen in G1 and G3. The fans are Radio Shack 4 inch fans. When the bottom fan motors needed replacing recently they were replaced with Gemline EM670 fans, but the Radio Shack fan casings were retained to protect the fan blades. The thermometers are Radio Shack indoor/outdoor thermometers with probes. Note that the thermometers are mounted on top of the incubator and the probes are inserted through a hole into the incubator as shown in G3. Two thermometers monitor each side with a probe on the highest and lowest shelf on each side. This thermometer arrangement allows for monitoring of temperature without opening the doors. A small fan not show in any of the photographs is placed below a hole in the chase that was formerly a refrigeration moisture drain. This fan constantly pulls fresh air into the chase which serves as the heating chamber and provides the needed fresh air, while allowing the air to be heated before being distributed into the incubator proper. A Radio Shack thermometer/humidity gauge hangs on the back wall of the left side. Humidity is controlled by placing a plastic pan full of water on the floor of the right side of the incubator.
This incubator is designed for the goose eggs to lie flat on the wire shelves. The eggs are turned 180 degrees three to four times daily. It has been our experience that goose eggs hatch better when placed on the side rather than the end. This incubator is constructed with all of the wiring rising through the chase. When the incubator is in use the fans are always on and the light bulbs are turned on by the thermostats when heat is need to keep the temperature at the desired level. The bulbs are 130 volt bulbs purchased at an electrical supply store. These bulbs give much better service than the normal 120 volt bulbs available at most retail outlets.


0 comments:
Post a Comment